Wednesday, November 14, 2012

Mmmmm! I love Fall!

Oh, I LOVE fall! I love the cool weather, the leaves, the excitement of the holidays coming up, and the smell of cinnamon. I canned quite a bit this season. This was my apple pie filling. I love having this on hand. It's great for all kinds of recipes (even over waffles on Saturday mornin')


These muffins are the absolute best muffins I have EVER made. They were so scrummy. Moist. Crunchy on top. Yup. Just right. This recipe is from  My Baking Addiction. Her recipes are fabulous.

Pumpkin Cream Cheese Muffins

Yield: about 24 muffins
Prep Time: 25 minutes
Cook Time: 20-25 minutes

Ingredients:

For the Filling

1 (8 ounce) package cream cheese, slightly softened - not room temp
1 large egg
1 teaspoon pure vanilla extract
3 tablespoons light brown sugar

For the Streusel Topping

4 1/2 tablespoons Gold Medal all-purpose flour
5 tablespoons white sugar
3/4 teaspoon homemade pumpkin pie spice
1/4 cup chopped pecans
3 tablespoons unsalted butter, slightly softened and diced

For the Muffin Batter

2 1/2 cups Gold Medal all-purpose flour
2 cups white sugar
2 teaspoons baking powder
2 1/2 teaspoons homemade pumpkin pie spice
1/2 teaspoon salt
2 large eggs
1 1/3 cups canned pumpkin
1/3 cup vegetable oil
2 teaspoons pure vanilla extract

Directions:

1. Preheat oven to 375°F. Spray muffin tins with nonstick cooking spray or line with paper muffin liners.
2. Prepare the Filling: In a medium bowl, with an electric mixer, beat cream cheese until soft; about 3 minutes. Add egg, vanilla and brown sugar. Beat until pretty smooth - there may be some cream cheese chunks, that's perfectly fine. Set aside.
3. Prepare the Streusel Topping: In a medium bowl, mix flour, sugar, pumpkin pie spice and pecans. Add butter and cut it in with a fork until crumbly. Set aside.
4. Prepare the Muffin Batter: In a large bowl, sift together flour, sugar, baking powder, pumpkin pie spice and salt. Add eggs, pumpkin, oil and vanilla. Beat with an electric mixer until just combined and smooth - do not overbeat .
5. Using a large scoop, evenly distribute the muffin batter between 24 muffin wells. Add one tablespoon of the cream cheese mixture into the center of the batter of each muffin. Try to keep cream cheese from touching the paper cup. Sprinkle on the streusel topping.
6. Bake in preheated over for 20 to 25 minutes. Remove muffin pans to cooling racks and allow the muffins to cool completely before serving.

Notes:

Pumpkin Cream Cheese Muffins are best served the day they are made; however, they will keep in an airtight container within the refrigerator for up to 2 days.

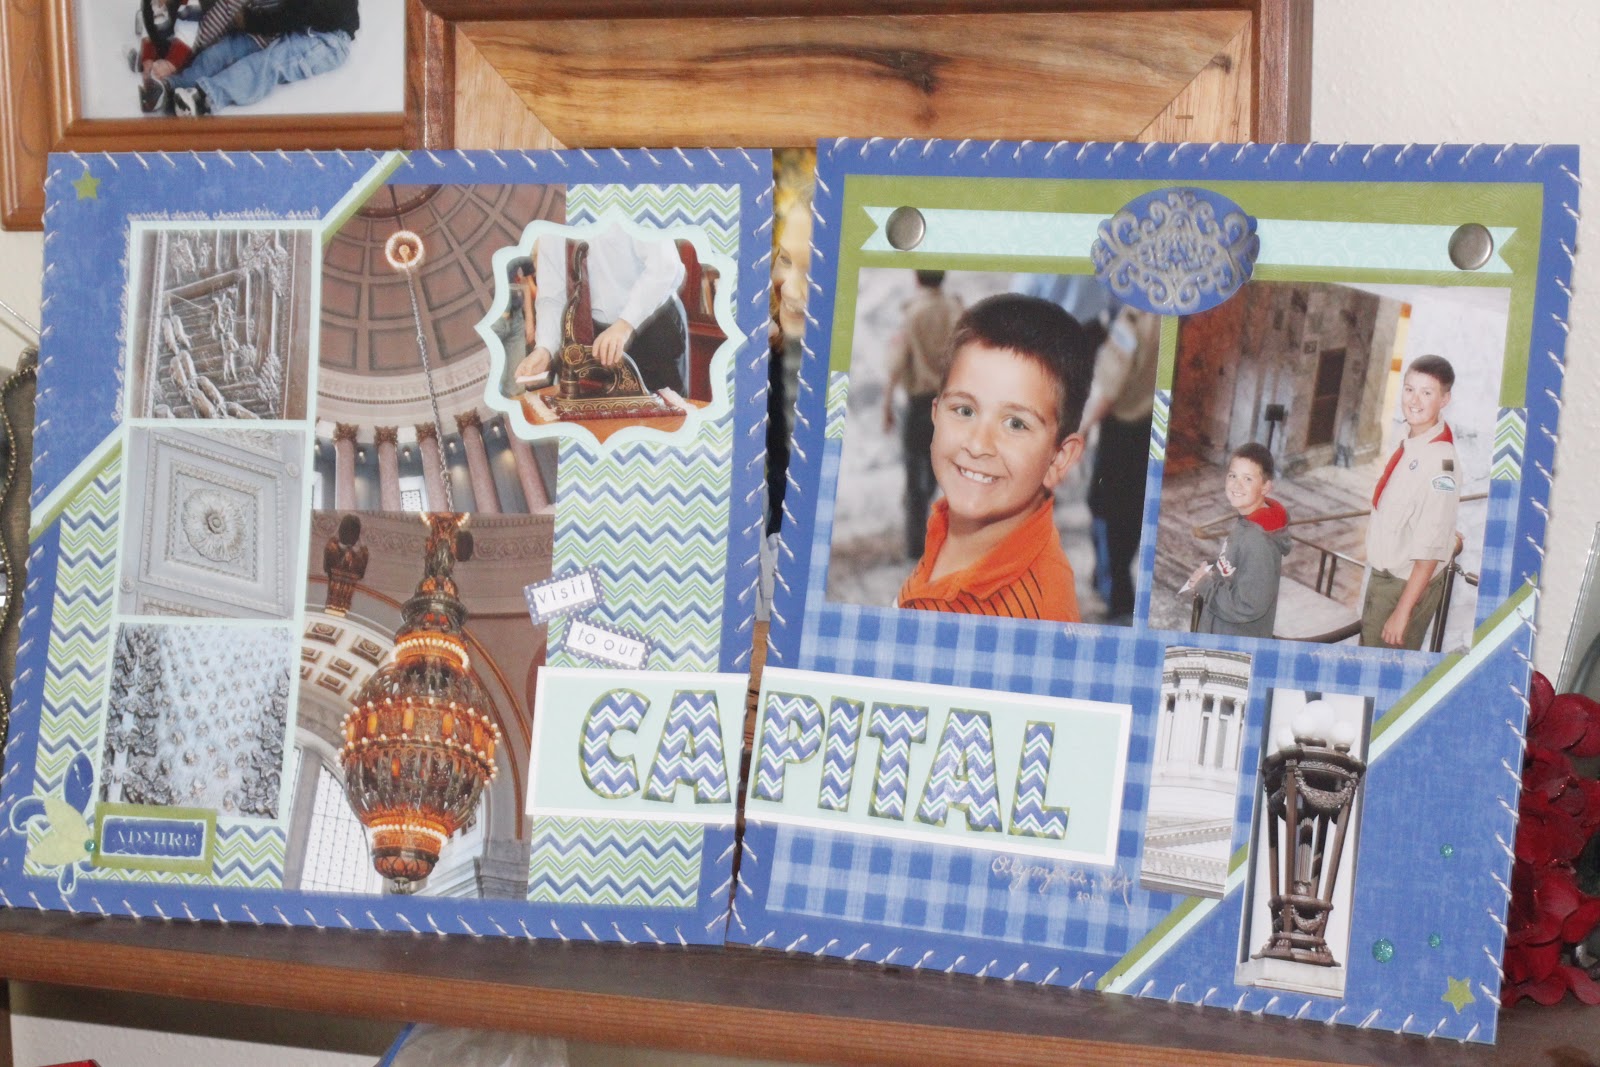
No, I haven't forgotten to scrap a bit on my days off. I am in love with my new background crackle stamp from Papertrey. So fun.


Sunday, October 28, 2012

pretties!


Peonies!!! I made this for a gal at work for her grandparents. I loved the fall colors!! and...gumpaste came to the rescue again. These peonies and roses were all made in advance, so I could focus on the baking only.


Gold luster dust is FUN!


to feed the crowd, I also made 150 cupcakes. These took forever, but were fun to decorate. I used my new dogwood flower cutter\embosser for these.


during conference a few weeks ago, I got to sit down and scrap a lil':) ahhhhh. I sure love scrappin'.


clear embossing resist technique

beading fun


oh, no! I have been sucked in by yet another trap. The owner of our PO beading store came over one night to teach us how to make these. My first ones were with pearls and this one is with S. crystals for Mom.

Friday, October 19, 2012

Lately

Lately...I've been pretty stinkin' busy. I am not sure at what point I will draw a line in the sand and say, "NO MORE!" I know I've overdone my schedule, but I can't seem to "let anyone down." So, I trudge onward. Once in a while, I get to play. I forget how much joy it brings me to create. aaaah. My basement is my haven. Here's a little of what I've been up to.


I SO love scrapbooking. I love the happy colors, happy memories, and happy thparklies:)...always


Michael's birthday cake was a mini disaster. The gumpaste went wrong...I had cut out some amazing horses. They were so intricate and cool. The day of...they crumbled. GRRR. So, we pulled out the plastic. This was that lemon cream cake recipe again. Boy was it scrummy...all torted and everything.


So, just in case you are wondering...Fat Daddios is THE brand to buy when getting nested cutters. They are plastic, so they won't get bent out of shape...especially important for the bigger ones. These were 4"x4", so it   would have a tendency to bend. Fat Daddios was awesome. Say it with me..."FAT DADDIOS" I then used my texture folders to emboss the fondant. I must say, though, the fondant has a hard time really adhering unless you put that fondant on there right out of the oven. Another solution is to pop it back in the oven for a minute to seal that puppy on there. 


Saturday, September 15, 2012

Lemon Cream Cake- DELISH

So, I finally did it:) I combined 4 recipes to get this product and it was WELL worth it. The cake: the cake is my yellow\vanilla cake recipe. Warm oven to 350 degrees. Mix 2 3\4 cup cake flour, 2 1\2 tsp baking powder, and 3\4 tsp of salt together in a bowl. Set aside. Beat 2 sticks of unsalted butter (room temp!) with 1 3\4 cup of sugar until fluffy. Beat in 4 large eggs (also ROOM TEMP!) one at a time, scraping bowl as ya go. Now add 1\2 cup of sour cream (or 1\4 cup mayo) This is what makes it so moist! You also have the option of adding 1 pkg of instant vanilla pudding to make it a little more dense(which I LOVE) Add 1 TBSP of vanilla (yes, tablespoon) Now begin to add the flour mixture to this, alternating with 1 1\2 cups of milk (room temp...very important!) until it's all mixed together and smooth! This will make 2 8" round cakes. It also works great for cupcakes. Bake in a greased pan for 25 minutes of until done. I chose to make this cake torte style, so each layer was also split into two layers for a total of 4 layers of yumminess. This made it possible to add more of the lemon cream filling, which, when you taste it, will make you want to add it every place you can squeeze it. I decided to make a very mild lemon buttercream in order to make the cake look pretty. I know the one at the restaurant doesn't have frosting, so I made it very thin...just to coat the sides and make a dam for the filling to not sneak out the sides. NOW, on to the lemon cream filling: 1 8oz pkg of mascarpone cheese (or cream cheese works great too. Just make sure it's softened so ya don't get lumps) juice from 1 lemon zest from half the lemon 1 cup powdered sugar 1 cup of heavy whipping cream Beat this all together until the cream starts to set up. It is HEAVEN! I needed more filling because I made a bigger cake. So I added 1 small pkg of cool whip. It made it a little lighter in texture, which made it even nummier. Not necessary, though. use this between each layer of cake and on top. ( I frosted the sides first, so I didn't get this down the sides.) Keep the cake cold as you're building it. It will keep the filling firm. To finish...and this is what I found to taste the best (as much as I hate to admit it) is to combine 4 TBSP of softened butter with 1 cup of lemon cake MIX ( I know...I know...) I just used two butter knives to cut the butter into the powder over and over and over...till it was a really fine crumble. SO tasty! Sprinkle this on top of the cream you have on top of the cake. SO FABULOUS! I think the next time I try this, I will make extra crumble and just coat the sides with the cream and crumble too...not as purdy, but it will eliminate the butter cream:)

Saturday, July 28, 2012

Up to August 2010

So, now that we finally have some good weather, I have to spend it wisely-er than I have been. I really need to get my house painting DONE. Pretty close now. So, I don't get much time for this any more. I just sneak it in on Sunday:)


Friday, July 13, 2012

Stitch Away


I love Bakers Twine now. I was a little hesitant at first because I have really liked using waxy flax. Close To My Heart came out with a ruler with little holes in it for using a piercing tool. You can choose any increment, so I chose one that was three apart. I really like the stitched look. Since I bought a spool of the blue twine, I didn't worry about using so much:) I also pulled out my embossing powder that has been stashed for too long. I used some silver powder that I bought when I was 18. It is so smooth when it melts! Most of the brands that are around now are a little chunky or don't melt together as much. I wish I could still get that brand. OH! AND! I got to use my new chevron stamp from Impress on the title letters. I am falling into the chevron craze.

Never too old for coloring

My nephew recently told his daddy that he was done coloring 'cause that was for little kids. Hmmm. I STILL like coloring;) ...especially with my Copics. This stamp was loaned to me by Katie and she reminded me of Hawaii. So cute. I used some Stampin' Up paper that has been stashed for a few years. I also "had" to glitter up the button on there, line the envelope and add some GellyRoll sparkle pen to outline the layers. It makes me smile!

Saturday, June 23, 2012

a lil' patriotism

Sometimes I get a little sad thinking about the state of our country. Other times, I feel empowered to make a difference. I love this chosen land of ours. I hope I can really instill this love in the hearts of my children. I want them to feel awe, inspiration, loyalty, and even thrill when they see our flag! God Bless America!!

Scabooty birthday page

This is new paper from SU! It is so clean and bright and cheerful and fun and ... LOVE it! Scotty is much the same. I love how cheerful and full of life that guy is. He is so happy, it's contageous. (yes, I am sorry to say that I am still crushin' on banners) n

Wednesday, May 30, 2012

Scrappy time

I finally got a few moments to get some pages done from 2010. I CANT get any more behind!!
Scott's birthday was last weekend. I saw this camping themed party on my friend's blog and knew it would fit right in with our new fire pit and outdoor party. Scott loves red, too, so this was perfect. The cake was my chocolate cake recipe, but I decided to try my hand at torting. Sweetwise lady has videos that are FABULOUS! Step by step and easy to follow. It was so shmeesy and fun. The filling was a creamy ganache pudding, SCRUMMY! I am sold on torting. Why did I wait so long?

Monday, May 7, 2012

Out of my SYSTEM...for now.

There! I have had my fix of baby AND girly. Now I feel better. This is actually a pocket page to store all my cards from my squooshies. I'll have to cut an opening in my page protector to allow access. The sun MUST be shining today...oh, wait...it IS!!! We'll hit 70's today. Aaaah. Now THAT is what I call a day off. Soakin' it up while boogyin' to some Eric Church and Chris Rene.

Oh, BABY!


I am getting pretty burned out on baseball\sports pages. It seems that is all I get to do nowadays. So, I jumped at the chance to make these for a girl at work who is due at the end of the month. I whipped these out in no time. I can tell it has been to long since I have been able to scrap FUN pages. It sure helped to have cute "Nana's Nursery" paper, too:) Aah. Now on to Mother's Day pages from 2010.

Sunday, April 29, 2012

Gluten free can be yummy...I guess


Costco's quinoa and wild rice mix is great! Add a little chicken broth and Parmesan cheese...nummy.


Tom's chili is to DIE for!!! He's got it down to perfection!! MMmmmm.
 Since finding out that my oldest is intol. to gluten, I have been trying to find tasty food that will keep him happy. He was always the one that loved bread, pasta, etc. So this has been really hard for him. There is so much out there now, though. We've found some really great substitutes. Bob's Red Mill is my hero!

Friday, April 20, 2012

Lovin' my day off:)


It's springtime and that comes with lots of baseball watchin'. These are still from 2010, but I am slowly making progress. I tried out my new Scor-Tape double sided adhesive in my Cricut for the banner...LOVE it. It is paper backed so it will stick to the Cricut mat while cutting. Some of the other brands are slippery and won't stay put while cutting.


I added this "book" because I couldn't crop these pictures and there wasn't room to squoosh them all on the page. I'll jsut make a cut-out in my album page protector and we'll be all good.